How to Make a Water Slide
Did you have fun with our Build a Swimming Pool STEM activity? Here’s a water slide to go with it! Kids can challenge themselves to build a waterslide or their little toys to slide down into the pool to cool off this summer. My kids have loved playing with their diy swimming pool but the water is always splashing over the sides. So I thought, why not fill it back up with a water slide?
Activity
Build a water slide from materials found around the house. The water slide must hold water without leaking and use gravity to make the water flow into the pool.
Materials for Building a Water Slide
We love using supplies found around that house that can be upcycled. For this GKC project we gathered the following:
- Paper Tubes
- Plastic Wrap
- Paper Straws
- Paper Cups
- Glue
- Tape
These are the materials I thought we’d be most likely to use when building the slide. Other materials we found but decided not to use included craft sticks, paints, plastic bags, and aluminum foil. I could totally see these materials working too so experiment with the supplies you already have around the house instead of buying new.
Planning the Water Slide
Before we started the construction of the water slide we planned out how it would work. We drew small sketeches of ideas and predicted the outcome of our experiment. I’ve added a simple planning worksheet for you to use with your family when making a water slide. It’s a great planning tool for any STEM activity you might be working on this summer.
Getting to Work!
Time to build! I would like to say that this is my kids’ favorite part of this activity but it’s actually a close second. They love playing with the slide more than the building of it! We started by prepping our paper tubes to make them water-tight.
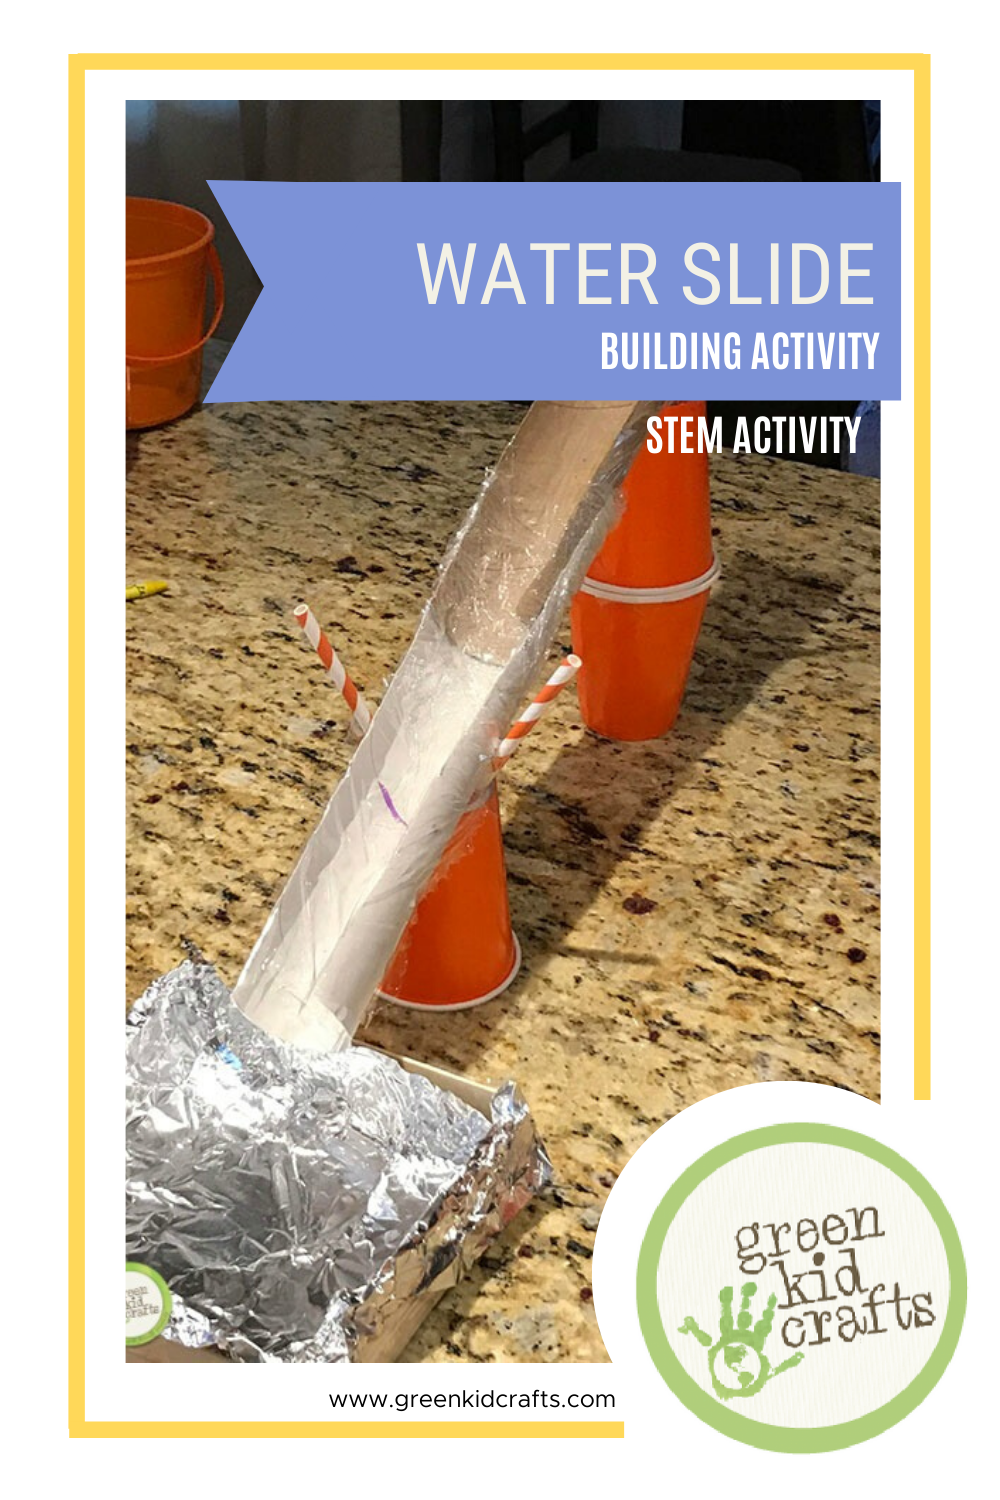
Cut the paper tubes down one side and pull the edges apart to make it look like a slide. Add a line of glue down the inside center of the tube. Cut a piece of plastic wrap large enought to cover the tube and attach it to the glue at it’s center. Wrap the plastic around the back and ends of the tube and secure with tape.
Attach the tubes together by placing one tube slightly inside of the second tube. Secure with tape on the backside of the tubes.
Holding up the Water Slide
We know that gravity must be used to bring the water down into the pool which means the slide needs to be held up at an angle. Building a structure to support the slide will keep the slide in a position for the water to flow down, but there are a few other things we need to keep in mind.
- The structure needs to support the weight of the paper tubes, water and toys.
- The structure eeds to hold the slide evenly so water deosn’t spill over the sides of the paper tubes.
- The slide needs to meet the pool at the bottom for the water to flow directly into the pool.
To achieve this we needed to make one side of the structure taller than the other. We started by planning the base of the structure. It would need to be strong and steady. Upside down paper cups formed a strong base and allowed us to hold the rest of the structure upright. We formed an Y shape with the paper straws and pushed them into two holes made in the base of the cups. We secured the straws with tape to hold them in place.
The last step was attaching the water slide to the structure. We did this by setting the slide on the Y shapes and holding it in place with tape
Now experiment with water flow and toys. How much water is needed for a larger toy to go down the slide? How fast does the smaller toys go?
Sharing is caring 💕 don’t forget to share this post on Pinterest !